
- On November 6, 2026
- In blog
What is Prepreg in PCB?
Wondering what prepreg is in a PCB? This article covers what it is made of, how it differs from core, how resin content sorts it into types, how resin flows, which glass fabric styles go into it, and how glass weave affects high speed signal.
Open any multilayer stackup table, and prepreg is right there. It looks plain, but it shapes board thickness, impedance, and long-term reliability. Almost every engineer asks the same question on a first multilayer design: What is prepreg in a PCB, and why does every stackup need it? Read on, because the answer starts with what the material is made of.
How Prepreg is Made?
Start with the material itself. Take glass fiber cloth, soak it in resin adhesive, and you get prepreg. Here is how it works: woven glass fiber forms the cloth, then the cloth is partly dried into what the industry calls B-stage material. The resin is hard, but it is not fully cured yet.
Two details matter here. First, operators have to work along the grain direction of the material. That is how they adjust it to spec. Second, the count of warp and weft yarn decides how much resin the cloth holds in the end.
The resin coats the cloth in a way that looks a lot like yarn making. And the weave? Under a microscope, it can be tight, like 7628, or fairly open, like 1080. A loom controls that weave.
What Is the Difference Between Prepreg and Core?
People mix these two up all the time, but each one does a different job.
Core works a lot like laminate. Manufacturers press, harden, and heat-treat one or more prepreg layers to make it, then clad both sides with copper foil.
Prepreg is different. Its resin is hard but not fully cured. Think of it as the glue that holds the cores together. Put a core on each side of a prepreg sheet and apply heat, and the resin starts bonding with the neighboring layer. Then cross linking slowly cures the hardened resin, and the material moves closer to core in performance.
The short version? Core is the finished copper clad substrate. Prepreg is the layer that bonds it.
Prepreg Resin Content in PCB
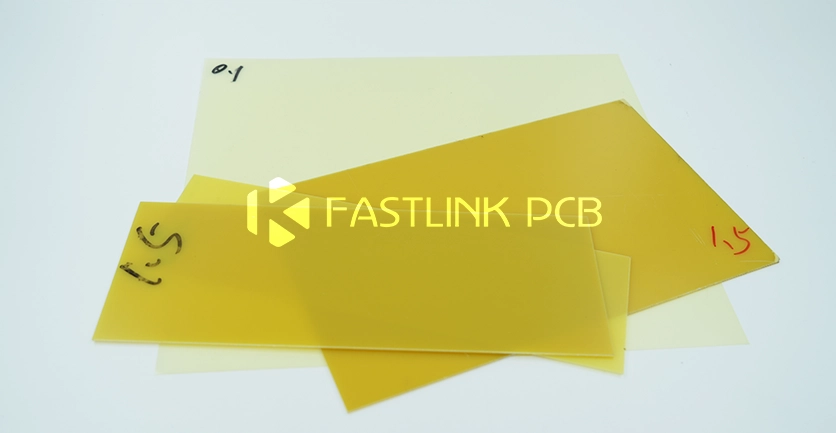
Resin content is the most common way to sort prepreg. Why does it matter? Because that number sets how well the material fills the ups and downs of copper traces during lamination, and it also keeps the final dielectric spacing steady. Exact percentages vary by maker, but the tiers look like this:
- Standard Resin (SR): Usually 40%–50%. It bonds plane layers, where little flow is needed.
- Medium Resin (MR): Usually 50%–60%. It fits most signal layers.
- High Resin (HR): Usually above 60%. It fills the big voids that etched copper leaves on high-density or heavy copper layers.
More resin means easier flow during lamination and better bonding. In high-density design, that helps resin fill every gap the etched copper pattern leaves behind.
Why Resin Content Matters?
Start with thickness: resin content sets how thick the layer ends up after pressing. It also clearly affects dielectric constant, CTE, and drilling and etching quality. Price moves too. More resin costs more, so weigh performance against cost when you choose. And one more thing: to hit a given dielectric thickness, the board shop often stacks several prepreg sheet together.
Resin content is only half the story. Resin flow is the other big principle for prepreg in PCB. Why? Because how the resin actually moves makes or breaks the lamination, and lamination conditions change that movement a lot.
Flow amount shapes several things: how well the layers stick together, how strongly the resin grips the oxidized copper foil on the inner layer, how well the prepreg works as a bonding sheet overall, and how firmly the laminate holds to the electrodeposited copper foil used to make it.
So the same prepreg can act differently under different lamination conditions. Same material, different result.
Glass Fabric Styles: 106, 1080, 2116, and 7628
Both core and prepreg draw on one standard set of glass fabric styles. The common ones are 106, 1080, 2116, and 7628. Each number tells you the yarn thickness and the fabric density.
| Type | Style | Yarn and Weave | Dielectric Layer and Resin |
| Lighter style | 106, 1080 | Finer yarn, more open weave | Thinner dielectric layer, higher resin content |
| Heavier style | 2116, 7628 | Thicker yarn bundle, tighter weave | Thicker dielectric layer, stronger bond per layer |
One more thing: glass and resin have different dielectric constants. That means the weave and the resin fill both shift the effective dielectric constant.
How to Choose Prepreg in PCB?
6 factors drive the choice:
- Target board thickness
- Required dielectric spacing
- Impedance control need
- Resin flow need
- Glass fabric style
- Thermal reliability goal
Here is a simple way to work through them. Start with board thickness and dielectric spacing. They tell you roughly how thick the prepreg should be and how many sheets to stack. Next, look at the impedance target and the trace layout to decide how much resin content and flow the design needs. Then pick the glass fabric style. For high-speed signal, think hard about glass weave effect at this step. Last, check the result against the thermal reliability goal.
Final Thoughts
Prepreg in PCB looks like a plain bonding layer in a multilayer PCB. It is not. Resin content, resin flow, and glass fabric style all shape layer thickness, electrical behavior, and signal performance. Get these three clear, and stackup design gets much easier.
Stuck on a multilayer stackup or a prepreg choice? Reach out to our engineering team.